Printable cryptogram puzzles with hints
Decode two short messages, one letter at a time. Each puzzle replaces the letters of an original phrase with a different alphabet. Write your guesses below the coded letters, then carry each discovery into every place that letter appears.
Free, no account or email. Two pages per puzzle PDF, one puzzle on each page. Optional help and complete answers are separate downloads below. Fixed sheets for pencil writing, with no editable fields.
Two messages to work out
Each puzzle has nine ordinary words, with the spaces and period kept in place. Each page has a small area for recording letter guesses and room to try out a word before putting it into the message.
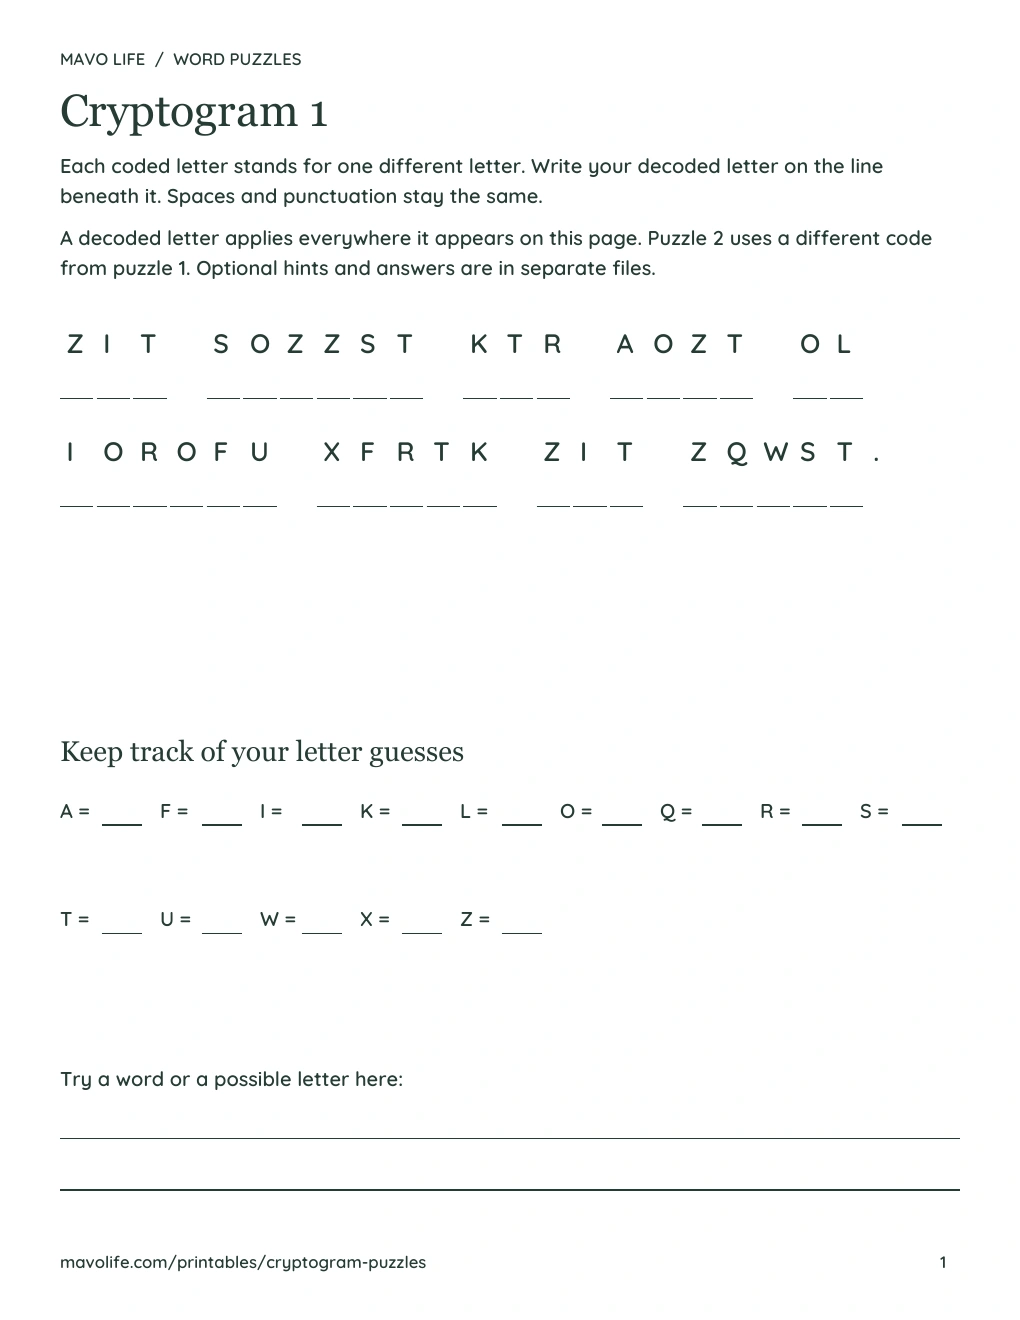
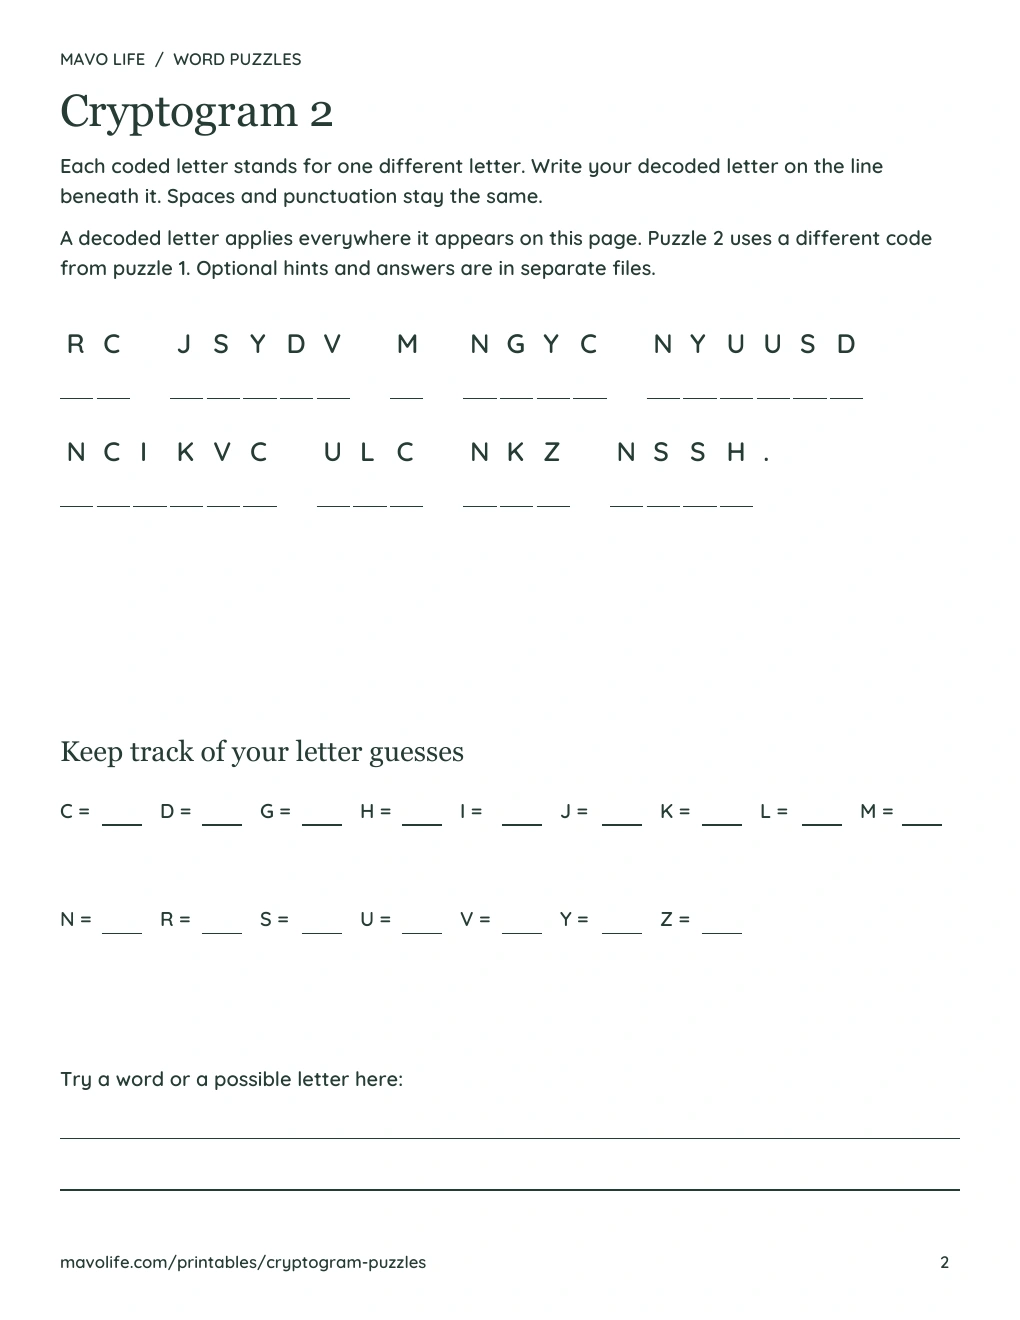
Choose either puzzle or print both. Use a pencil so you can change a guess. Puzzle 2 uses a new substitution: a letter you decoded on page 1 may stand for something else on page 2.
Find one letter, then use it everywhere
Each coded letter stands for one answer letter throughout that puzzle. Two different coded letters cannot stand for the same answer letter. The letters above the lines are the code; the letters you write beneath them are the message.
Start with a short word or a repeated pattern. A one-letter word may be A or I. Two matching letters in a word must decode to two matching letters, so keep that pattern when trying a guess. Short puzzles give you fewer clues than a long passage; the optional hints provide a starting point if you’re stuck.
Show puzzle 1’s worked start (reveals T, H and E)
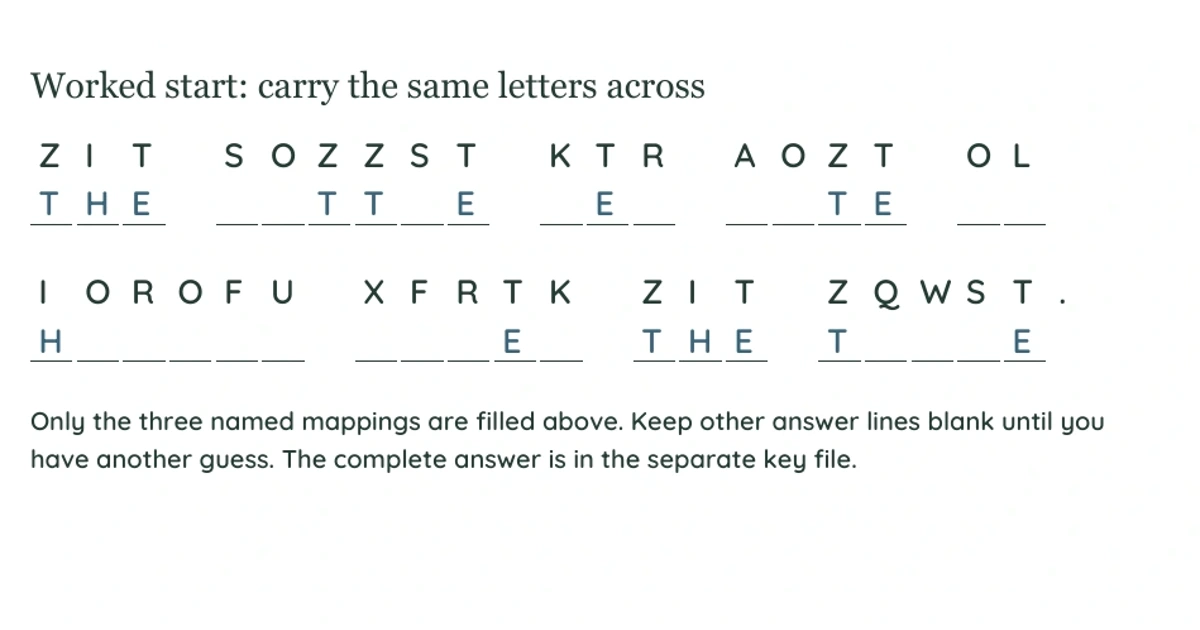
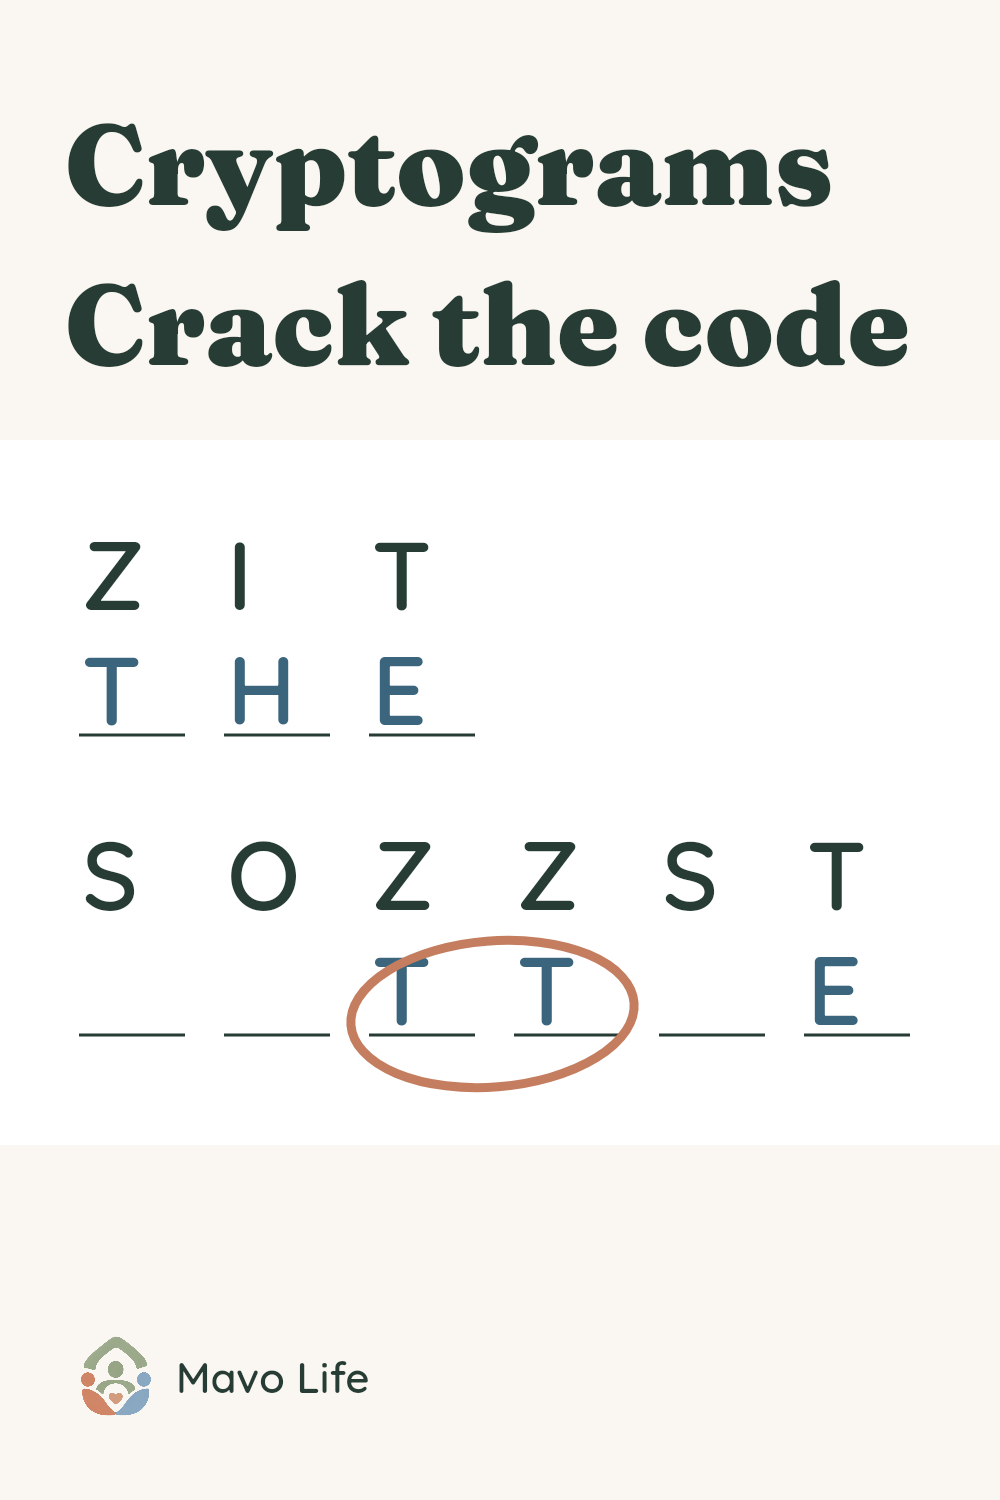
In puzzle 1, Z stands for T, I stands for H, and T stands for E. That makes the first coded word, ZIT, read THE. Put T beneath every Z, even when it is in the middle of another word. The double Z in SOZZST becomes a double T.
Top: coded letters. Below: the letters revealed by the three hints.
The same Z → T mapping fills the first letter of both ZIT words, two letters in SOZZST, a letter in AOZT and the first letter in ZQWST. Leave the remaining spaces open until another guess fits.
When a guess causes a conflict elsewhere, erase that mapping everywhere you used it. Check the word length, repeated letters and spelling before trying again. The scratch key gives you one place to remember what you’re testing.
Use a hint without opening the full answer
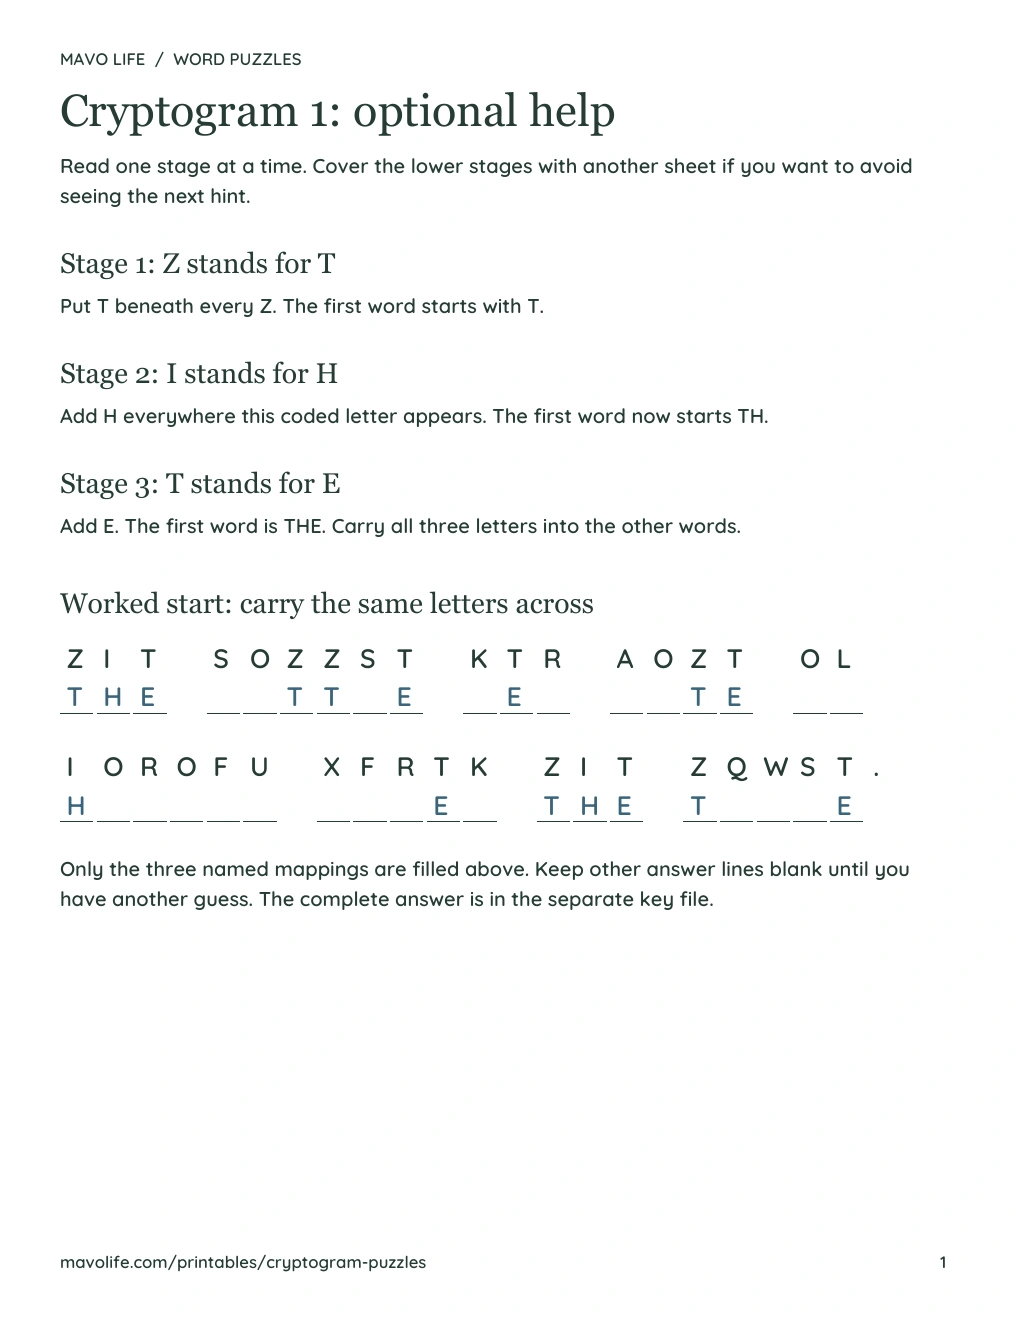
The help PDF has one page per puzzle. Each offers three stages, then shows those three mappings applied to the actual message. Cover the lower stages with another sheet if you want to read one at a time. For screen use, open just the hint you need below.
Puzzle 1 hints
Puzzle 1, hint 1: reveal one mapping
Z stands for T. Write T under every Z in this puzzle.
Puzzle 1, hint 2: reveal one mapping
I stands for H. Write H under every I in this puzzle.
Puzzle 1, hint 3: reveal one mapping
T stands for E. Write E under every T in this puzzle.
Puzzle 2 hints
Puzzle 2, hint 1: reveal one mapping
M stands for A. Write A under every M in this puzzle.
Puzzle 2, hint 2: reveal one mapping
N stands for B. Write B under every N in this puzzle. This coded letter starts five words.
Puzzle 2, hint 3: reveal one mapping
S stands for O. Write O under every S in this puzzle.
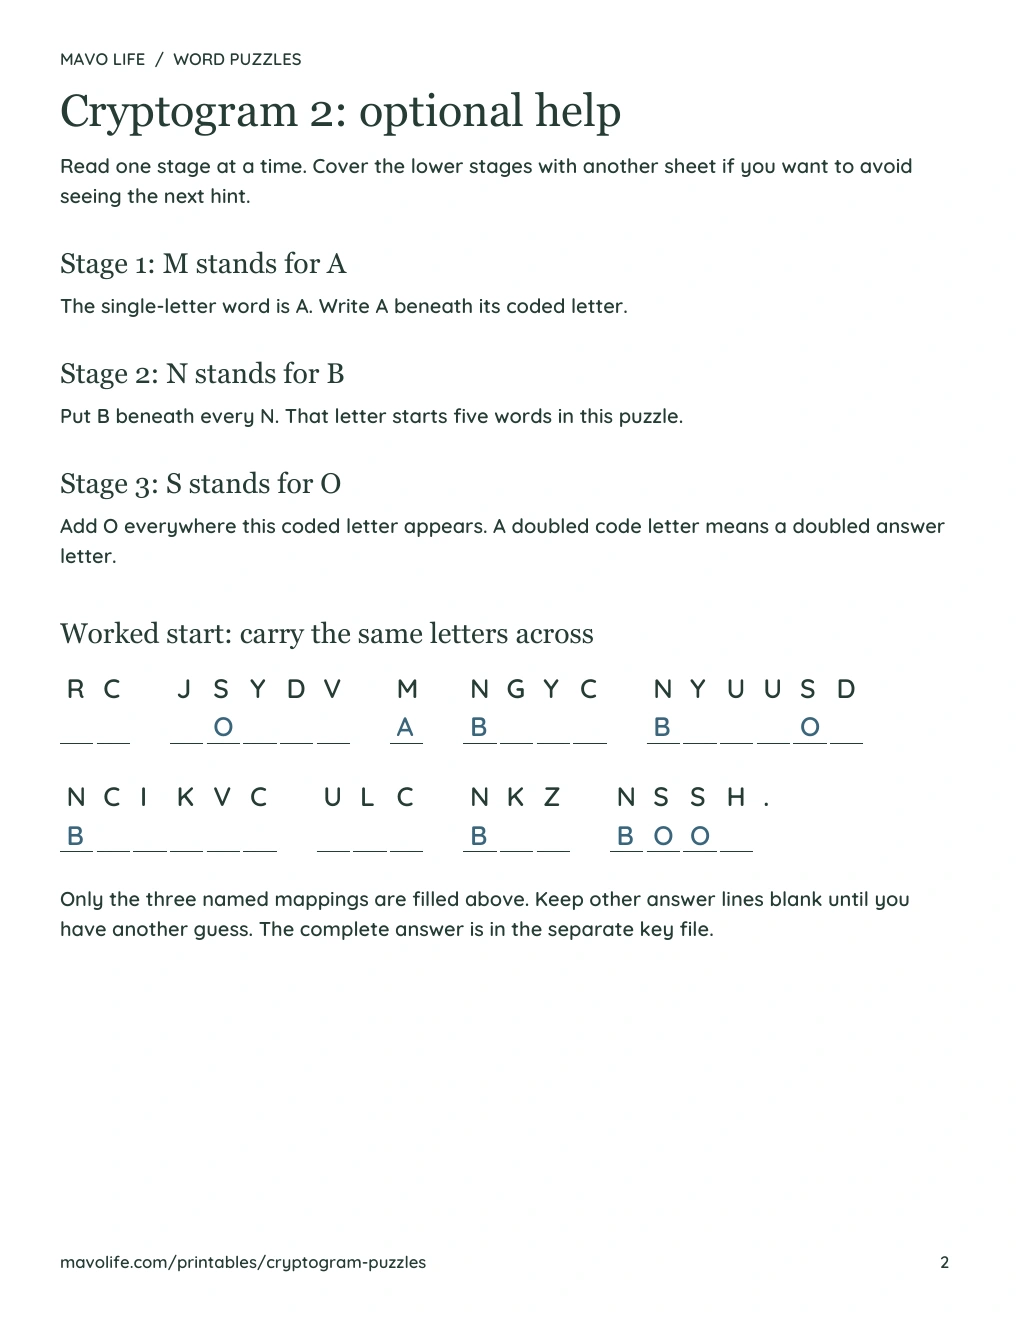
Show puzzle 2’s worked start (reveals A, B and O)
The one-letter word M is A. N stands for B in five different words; S stands for O. Carry these three mappings through the message, including both S letters in NSSH.
Top: coded letters. Below: the letters revealed by the three hints.
Preview the help pages (reveals all three hints)
Show both complete answers and key previews
Puzzle 1: THE LITTLE RED KITE IS HIDING UNDER THE TABLE.
Puzzle 2: WE FOUND A BLUE BUTTON BESIDE THE BIG BOOK.
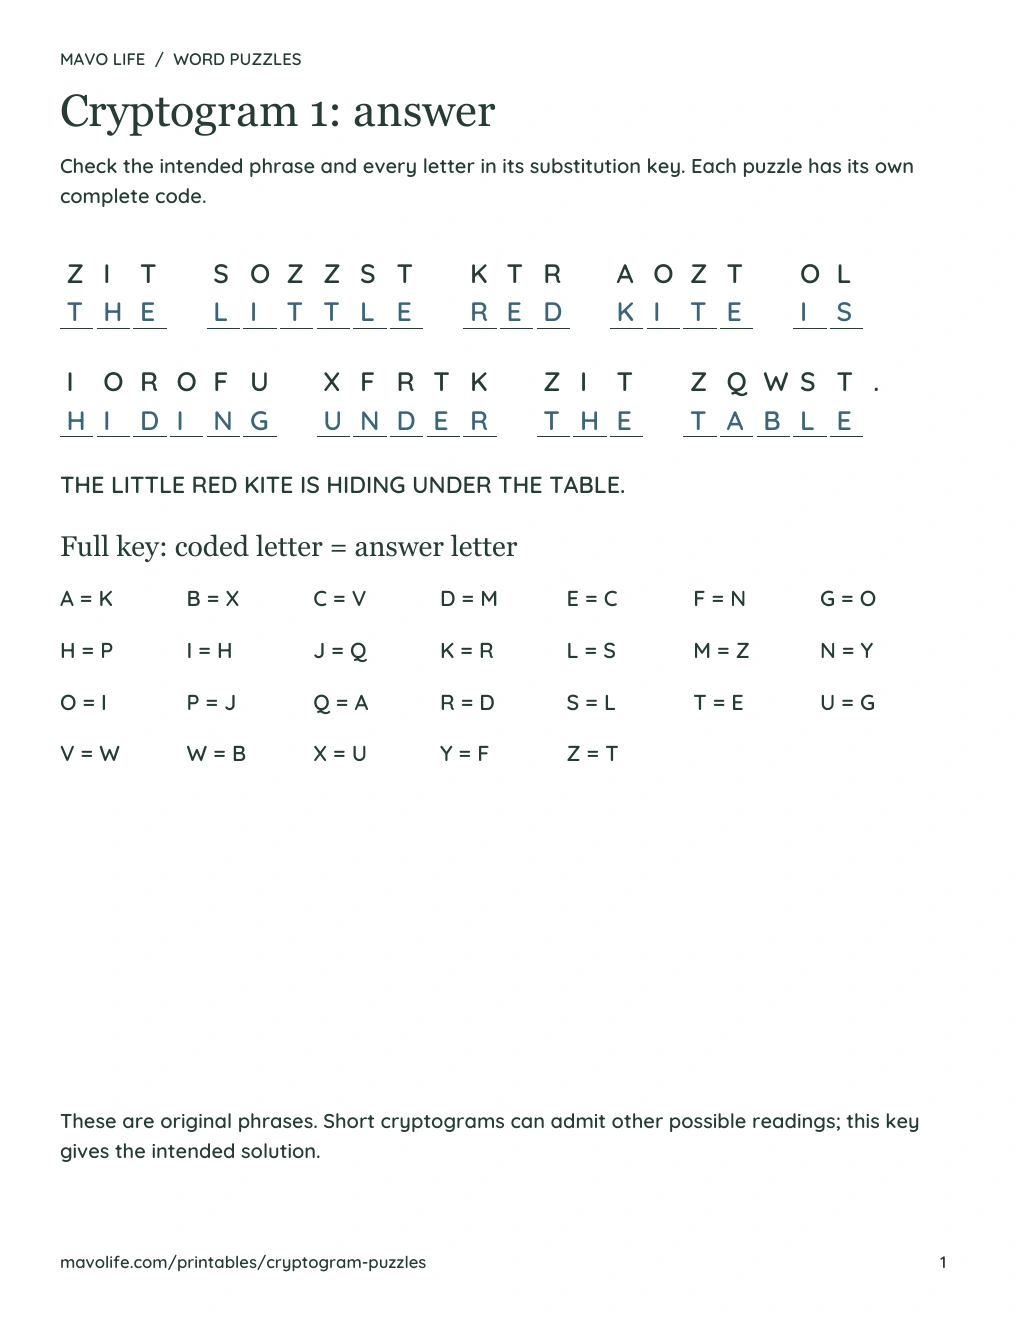
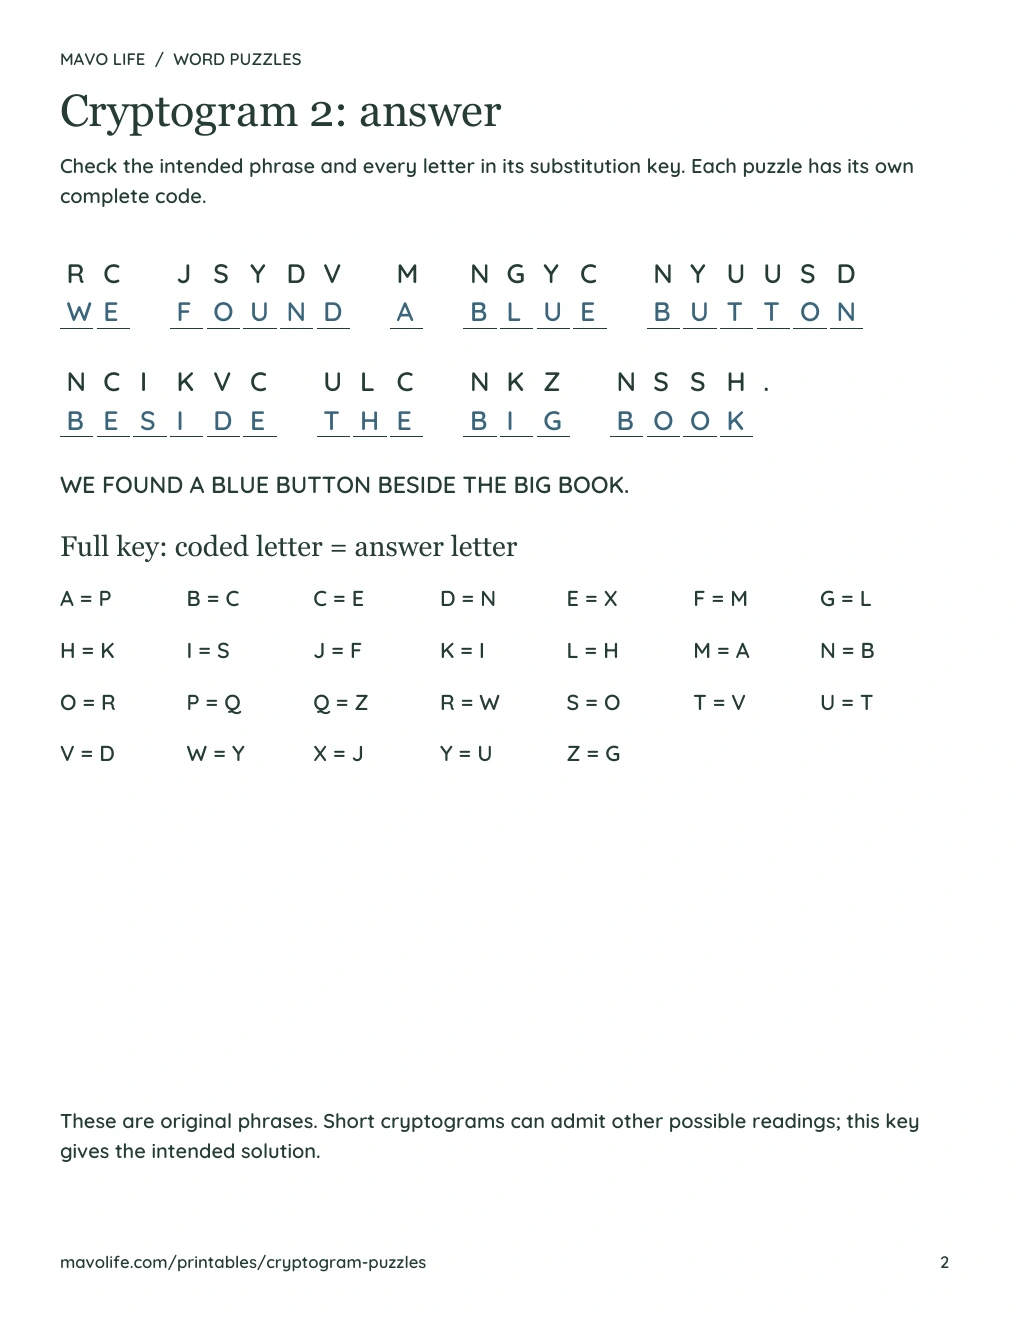
The answer file gives the intended original phrases and the complete substitution keys. A short cryptogram can have other possible readings; this set doesn’t promise a unique mathematical solution.
Print the puzzles first and keep the keys aside
Choose US Letter for 8.5 × 11-inch paper or A4 for 210 × 297-millimeter paper. Print in portrait at Actual size or 100%, single-sided. Each file contains two pages: page 1 belongs to puzzle 1 and page 2 to puzzle 2.
The puzzle, help and answer files are separate, so you can print just the puzzles. If you print the help too, keep it face down until someone asks. Leave the full keys aside while solving.
At 100%, answer positions are spaced about 0.31 inches apart, with 16-point coded letters and 12-point directions. Dark lines on white paper work in grayscale. Check your printer’s preview for clipped edges or automatic scaling. Print from the PDFs; the web images are previews.
Save a decoding break
Try a different kind of word puzzle
For clues and crossing letters, use the short crossword puzzles. For finding hidden words, try the sports word-search sheets. Browse the printable library for more paper activities.
Published October 14, 2026.